
Bradshaw Gates • Fence & Gate Advice
November 9Preventing Leaning Fence Posts During Installation
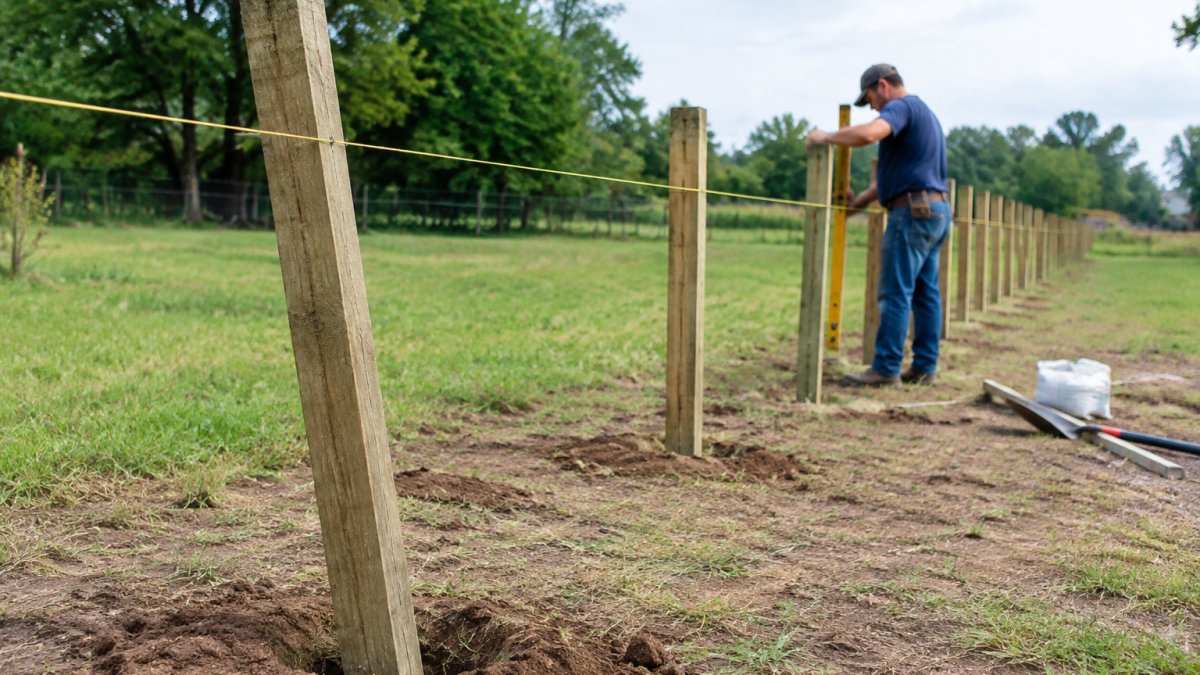
Quick Summary
Leaning fence posts usually come from soft or wet soil, poor drainage, shallow holes, and wind pushing on the panels. Setting each post deep enough for its height and soil, adding gravel drainage, bracing, and checking plumb before the concrete sets prevents most of this.
- A common general guideline is burying about one-third of the post's total length.
- Burial depth should increase as finished fence height increases.
- Add 4 to 6 inches of compacted gravel to the bottom of the hole.
- Dig the hole about three times the post width.
- Check plumb on two adjacent faces and brace with two diagonal braces.
Table of Contents
- Why Fence Posts Lean and What Causes It
- Soil, drainage, and frost movement
- Fence-line forces and wind load
- How line, corner, end, and gate posts differ
- How Deep to Set Fence Posts for Your Site
- Match depth to fence height and wind exposure
- Adjust for soil type
- Account for frost depth
- Size the footing, not just the hole
- Preparing the Hole, Drainage, and Post Layout
- Setting Posts Plumb with Tools, Bracing, and Concrete
- Concrete setting and curing time before hanging panels
- Stabilizing a post in soft soil without concrete
- Booking a Straight, Lasting Fence Installation with Bradshaw Gates
- Frequently Asked Questions
Why Fence Posts Lean and What Causes It
Leaning fence posts usually have predictable causes: soft or wet soil, poor drainage, shallow holes, and wind pushing against panels all day. Once you know what is pulling a post over, you can prevent most of it before the first hole is dug.
A leaning fence post has moved out of plumb. Even a small tilt throws off panel alignment and stresses the fence line, usually building slowly over several seasons.
Soil, drainage, and frost movement
Soil does most of the work holding a post in place. Loose fill, swelling clay, and sandy ground all behave differently under load. Water is the biggest variable: when rain pools around the base, the soil softens and loses grip.
Freezing weather adds frost heave: moisture in the ground expands as it freezes and pushes upward on the post (Frost heaving of piles with examples from Fairbanks, Alaska).
Common soil and drainage problems to check:
- Soft or loose fill: Dug-up soil that was never packed back down
- Clay that holds water: Swells when wet and shrinks when dry
- Low spots that collect runoff: Water sits against the post for days
Fence-line forces and wind load
Wind hits every panel, and a solid privacy fence catches far more wind than an open rail or chain-link design. That force travels down into the posts and along the rails, and corner and gate posts often carry the heaviest load because they anchor the whole run.
A heavy gate swinging back and forth pulls on its post every time it moves, and that repeated pull can tip a post that was only set halfway into the ground.
How line, corner, end, and gate posts differ
- Line posts sit between corners and carry panels and wind load from one direction at a time. They are the least demanding, but still need adequate depth and compaction.
- End posts terminate a run and take fence tension in one direction. They need deeper burial and often a brace back to the first line post.
- Corner posts change fence direction and resist tension from two directions at once. They are the most heavily loaded posts in a straight run and should be set deeper and wider than line posts.
A common pattern is to brace corner, end, and gate posts with a diagonal brace or a horizontal rail back to the next post, spreading the load and keeping the post from being pulled toward the fence line.
Watch out: The biggest mistake is treating every post the same. A gate post, a corner post, and an interior line post face very different forces, so they need different depths and bracing.
Diagram showing load directions on various fence posts to prevent leaning fence posts with bracing recommendationsHow Deep to Set Fence Posts for Your Site
Depth most affects whether a post stays straight, but no single number fits every site. A common general guideline is burying about one-third of the post's total length. That works for a 4-foot line post in firm, well-drained soil, but not for a 6-foot privacy fence on clay, a gate post, or deeply freezing ground.
Match depth to fence height and wind exposure
Taller fences catch more wind, and the post has to resist a larger overturning force. As a general principle, burial depth should increase as finished fence height increases, since taller fences present more wind load to the post.
Wind exposure matters as much as height. A fence on an open ridge, a coastal lot, or a property line with no windbreak sees more sustained load than one tucked behind a building or tree line.
Adjust for soil type
Soil determines how much grip the post has. The same depth behaves very differently in sand and in clay:
- Firm, well-drained loam: the baseline depth is usually adequate.
- Clay that swells and shrinks: deeper, wider holes with gravel and backfill around the post help resist movement.
- Sandy or gravelly soil: holes may need extra depth because the walls can cave and the soil has less lateral strength.
Account for frost depth
In cold regions, the hole must reach below the depth where the ground freezes, or frost heave can lift the post and let it settle back at an angle. Frost depth varies widely by region and even by local soil and snow cover; your local building department can confirm the design frost depth for your address. Set the bottom of the footing at or below that depth, and slope the ground and concrete cap so water drains away.
Size the footing, not just the hole
The hole width matters as much as its depth.
A deeper, wider hole costs a little more in time and material, but it prevents the far more expensive job of resetting a leaning run.
Preparing the Hole, Drainage, and Post Layout
Good preparation keeps water away from the post and gives it a firm base.
Dig the hole wider than the post, usually about three times the post width. That extra space lets you pack material around the post and lock it in place. Remove any loose or soft soil from the bottom.
Build in drainage before the post goes in:
- Add 4 to 6 inches of compacted gravel to the bottom of the hole.
- Set the post on the gravel so water drains away from the wood.
- Keep the top of the concrete or backfill sloped so rain runs off.
Water drains better through gravel than through clay, so this step helps most on heavy soil and keeps the bottom of the post out of standing water.
Lay out the posts so each one lines up with its neighbors, and check spacing with a tape measure at each end of the run before you commit to concrete.
Setting Posts Plumb with Tools, Bracing, and Concrete
Plumb means straight up and down, and it is the goal for every post. Check the post with a level on two adjacent faces.
Temporary bracing keeps the post still while the material sets.
The tools that make this job faster and more accurate:
- A 4-foot level for checking plumb
- Diagonal braces and stakes for holding position
- A post hole digger or auger for clean, straight holes
Set the post in concrete if the soil is firm enough to hold it, or use another method if the ground is too soft. Pour the concrete around the post, then slope the top surface away from the wood.
Concrete setting and curing time before hanging panels
Concrete needs time to gain strength before it carries any load. Most fence-post concrete reaches a workable hardness within a day, but full strength takes longer. Allow concrete to cure fully before hanging panels, and allow longer in cold or wet weather.
Stabilizing a post in soft soil without concrete
Concrete is not always the right choice. In some soft soils, a post set in dry-packed gravel or compacted soil holds better than one set in concrete that traps water.
For a post that must be set in very soft ground, consider a ground spike or post anchor driven below the frost line.
The table below summarises the key checks and timings for keeping each post plumb while it sets.
| Step | What to do | Time or frequency |
|---|---|---|
| Check plumb | Level two adjacent faces of the post | Before and after bracing |
| Brace the post | Attach two diagonal braces, one per face, staked into ground | Until concrete sets |
| Set in concrete | Pour around post, slope top away from wood | Recheck plumb before it firms |
| Cure before panels | Allow concrete to gain strength | Longer in cold or wet weather |
| Pack backfill | Tamp backfill in layers, compacting each | Layer by layer |
Booking a Straight, Lasting Fence Installation with Bradshaw Gates
Preventing leaning posts comes down to four things: the right depth, good drainage, careful plumb checks, and enough cure time before the panels go on. Get those right, and the fence stays straight for years.
If you want the work done correctly the first time, Bradshaw Gates handles custom fencing and gate fabrication for residential and commercial properties across the Four-State area.
Ready for a straight, lasting fence? Bradshaw Gates builds custom fences and gates that stay plumb through real-world wind and terrain. Get a Quote today.
Frequently Asked Questions
How to stop a fence post from leaning?
Set the post at least one-third of its total length in the ground, pack the hole in layers, and brace the post plumb until the concrete or backfill has set. Good drainage matters too: a post sitting in standing water loses support as the soil softens. If a post already leans, straighten it early, before the ground settles around it. For persistent problems, consider a ground spike or a diagonal brace attached to a sound anchor point.
What is the 1/3 rule for fence posts?
The one-third rule is a common starting guideline: bury about one-third of the post's length in the ground. A 6-foot post, for example, would go roughly 2 feet down. Deeper is often better in loose or wet soil, and the exact depth should be adjusted for frost line, wind exposure, and fence height. Treat the rule as a minimum starting point and confirm local frost-depth requirements before digging.
Should fence posts be set in concrete or gravel?
Both can work. Concrete gives the strongest resistance to leaning, especially for gate posts and corner posts that carry lateral load. Compacted gravel drains better and allows for easier adjustment, but it offers less rigidity. Many installers use gravel at the base for drainage and concrete in the upper portion. Choose based on soil type, drainage, and how much side force the fence will see.
How long should concrete cure before attaching fence panels?
Concrete needs time to set and gain strength before you attach panels and apply side load. Allow it to cure fully before hanging heavy gates. Keep posts braced during this period, and avoid hanging heavy gates until the concrete has firmed up. Cool or wet weather slows curing, so allow extra time in those conditions.
Add bradshawgates.com as a preferred source on Google →Frequently Asked Questions
How to stop a fence post from leaning?
Set the post at least one-third of its total length in the ground, pack the hole in layers, and brace the post plumb until the concrete or backfill has set. Good drainage matters too: a post sitting in standing water loses support as the soil softens. If a post already leans, straighten it early, before the ground settles around it. For persistent problems, consider a ground spike or a diagonal brace attached to a sound anchor point.
What is the 1/3 rule for fence posts?
The one-third rule is a common starting guideline: bury about one-third of the post's length in the ground. A 6-foot post, for example, would go roughly 2 feet down. Deeper is often better in loose or wet soil, and the exact depth should be adjusted for frost line, wind exposure, and fence height. Treat the rule as a minimum starting point and confirm local frost-depth requirements before digging.
Should fence posts be set in concrete or gravel?
Both can work. Concrete gives the strongest resistance to leaning, especially for gate posts and corner posts that carry lateral load. Compacted gravel drains better and allows for easier adjustment, but it offers less rigidity. Many installers use gravel at the base for drainage and concrete in the upper portion. Choose based on soil type, drainage, and how much side force the fence will see.
How long should concrete cure before attaching fence panels?
Concrete needs time to set and gain strength before you attach panels and apply side load. Allow it to cure fully before hanging heavy gates. Keep posts braced during this period, and avoid hanging heavy gates until the concrete has firmed up. Cool or wet weather slows curing, so allow extra time in those conditions.
Planning a fence or gate project?
Bradshaw Gates serves Northeast Oklahoma and the Four-State area.
Request a Quote Call 918-325-0057