
Bradshaw Gates • Fence & Gate Advice
November 47 Residential Gate Opener Troubleshooting Tips That Work
Last Updated: November 4, 2026
Quick Summary
Effective gate opener troubleshooting starts with safety: cut power and put the opener in manual release before testing anything, then read the diagnostic LED codes. A gate that moves freely by hand points to an electrical or control fault, while one that fights you points to a mechanical problem.
- Count the diagnostic LED blinks and write the code down before resetting anything.
- A remote that fails is usually a dead battery, so swap in a fresh one first.
- After a reset, wait thirty seconds and let the board run its self-check.
- A gate that reverses mid-travel is usually obeying its photo-eye obstruction sensor.
- Lubricate hinges, rollers, and the drive chain twice a year to prevent most calls.
Table of Contents
- Start With the Safest Checks Before You Touch Anything
- Put the Opener in Manual Release First
- Read the Diagnostic LED and Error Codes
- Power Supply, Circuit Breaker, and Voltage Testing
- Gate Opener Remote Not Working? Check These Four Things
- How to Reset an Automatic Gate Without Making It Worse
- Electric Gate Not Working After Rain: Water, Grounding, and Surge Damage
- Sliding Gate Troubleshooting: Track, Chain, and Limit Switch Faults
- Safety Sensors, Photo-Eyes, and Why Your Gate Reverses
- Read the Sensor LEDs Before You Touch Anything
- Align the Lenses Squarely
- Test the Safety Loop and Force Setting
- When the Sensor Is Fine but the Gate Still Reverses
- Smart Home Integration and Seasonal Maintenance Checks
- Diagnose the App-to-Gate Path in Order
- Seasonal Maintenance That Prevents Most Calls
- Post-Storm and Cold-Weather Checks
- Frequently Asked Questions
Start With the Safest Checks Before You Touch Anything
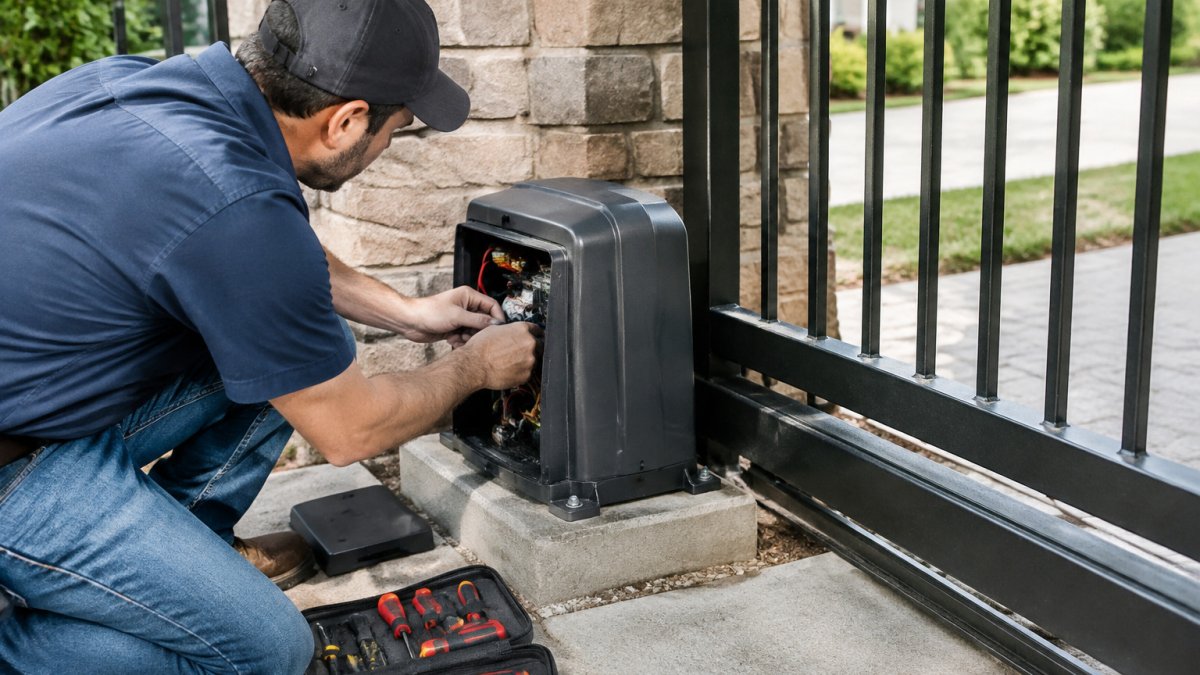
Most residential gate opener troubleshooting tips skip the one step that prevents injury: cutting power and releasing the arm. Before you test a single wire, put the gate in manual release. An automatic gate opener stores enough force to crush a hand or pin a child, and it will not warn you before it moves. The safest diagnostic is the one you run with the operator disengaged.
Put the Opener in Manual Release First
Find the release key or lever on the actuator arm, turn it, and swing the gate by hand. A gate that moves freely points to an electrical or control problem. A gate that fights you points to a mechanical one. This single test splits your troubleshooting in half.
Read the Diagnostic LED and Error Codes
Most control boards flash a diagnostic LED in a set pattern. Count the blinks, then check the sticker inside the housing or the manual for what that code means. Write the code down before you reset anything. A code you cleared is a clue you threw away.
Power Supply, Circuit Breaker, and Voltage Testing
Dead gate? Check the obvious first. Look at the circuit breaker feeding the opener circuit and reset it once. If it trips again immediately, stop.
Next, confirm the transformer is putting out voltage. Use a multimeter set to AC volts at the opener's power terminals and compare the reading to the spec on the transformer label.
Watch out: never test voltage with wet hands or a damp control box. Water and live terminals are how DIY repairs turn into emergency room visits.
Gate Opener Remote Not Working? Check These Four Things
A gate opener remote not working is usually one of four faults, and you can rule out all of them in about five minutes.
Quickly Diagnose Automatic Gate Opener Problems! All-O-Matic Gate Opener
United Tradesman Academy
- Battery: Swap in a fresh battery before anything else. It is the most common cause by far.
- Transmitter range: Step closer. If the remote works at ten feet but not from the driveway, suspect a weak battery or antenna damage.
- Keypad programming: If the keypad fails but the remote works, the keypad code likely dropped. Reprogram it per the manual.
- Receiver pairing: If neither works, re-pair one remote to the receiver to confirm the receiver itself is alive.
How to Reset an Automatic Gate Without Making It Worse
Learning how to reset automatic gate controls is simple. Doing it without losing your settings is the trick. Most boards have a reset button or a power-cycle procedure: kill power at the breaker, wait thirty seconds, restore power, and let the board run its self-check.
Do not reset repeatedly hoping the fault clears. Each reset wipes the error log. If the gate fails again after a reset, the fault is real and needs diagnosis, not another reboot.
Electric Gate Not Working After Rain: Water, Grounding, and Surge Damage
An electric gate not working after rain almost always traces to moisture, grounding, or a surge. Water gets into the control box, the photo-eye lenses, or a junction, and the board shuts down to protect itself.
Check these after a storm:
- Open the control box and look for standing water or corrosion on terminals.
- Confirm the grounding rod and ground wire are intact. Poor grounding invites surge damage.
- Inspect for a tripped surge protector or a blown fuse on the board.
- Dry the photo-eye lenses. Fogged or wet lenses read as an obstruction.
If the gate died during a lightning storm and the board shows scorch marks, replace the board rather than chasing individual components.
Sliding Gate Troubleshooting: Track, Chain, and Limit Switch Faults
Sliding gate troubleshooting starts at the ground. Sweep the track and check for debris, bent rail, or a lifted wheel. A gate that grinds or drifts sideways is usually a track or roller problem, not an opener problem.
Then check the drive chain tension and lubrication. A loose chain slips; an over-tight one strains the gearbox. Finally, inspect the limit switches.
Safety Sensors, Photo-Eyes, and Why Your Gate Reverses
A gate that reverses mid-travel is usually obeying its obstruction sensor, not malfunctioning. Photo-eye sensors shoot an invisible beam across the opening.
Get a Quote →
Homeowner aligning a gate opener sensor with a screwdriver to fix reversing issuesRead the Sensor LEDs Before You Touch Anything
Most photo-eye pairs have a status LED on each unit. A steady light on both usually means the beam is made and the pair is healthy. A blinking or dark LED on one side points to a misalignment, a blocked lens, or a dead unit. Note which side is dark: the transmitter (the unit with no wires running to the board beyond power) and the receiver (the unit wired to the control board) fail differently.
Align the Lenses Squarely
Loosen the mounting screws just enough to move each lens, then sight down the beam path so the two lenses face each other squarely, not angled toward the driveway or tilted up at the sun. Tighten one side, confirm its LED, then adjust the other. Wipe both lenses with a dry microfiber cloth; plastic lenses haze over time and a hazy lens scatters the beam enough to cause nuisance reversals on bright mornings.
Test the Safety Loop and Force Setting
With the beam clear and both LEDs steady, run the gate and break the beam by hand mid-travel. The gate should stop and reverse.
Watch out: never bypass, tape over, or unplug a photo-eye to "fix" a reversing gate. The UL 325 safety standard for gate operators requires an entrapment protection device on every automatic gate, and a defeated sensor turns a nuisance reversal into a crush hazard.
When the Sensor Is Fine but the Gate Still Reverses
If both LEDs are steady, the beam breaks cleanly, and the gate still reverses, the fault is upstream: a loose wire in the receiver harness, a control board that has lost its sensor input, or a limit switch that is reporting a false position. Re-seat the receiver wiring at the board, then run two full open-close cycles to confirm the travel and reversal behavior.
Before you adjust anything, here is what each photo-eye symptom usually points to.
| Symptom | Likely cause | What to do |
|---|---|---|
| Steady LED on both units | Beam is made, pair is healthy | Move on to the safety loop and force setting |
| Blinking or dark LED on one side | Misalignment, blocked lens, or dead unit | Note which side is dark, then realign or clean |
| Dark receiver, lit transmitter | Wiring or board problem | Check wiring at each sensor and terminal block |
| Dark transmitter | Power or a failed unit | Check power to the transmitter unit |
| Reverses only at dawn or dusk | Sun glare hitting the receiver | Add a sun shield or reposition the lens |
| Reverses with both LEDs steady | Loose receiver harness, board input, or limit switch | Re-seat receiver wiring, run two full cycles |
| Gate does not reverse when beam is broken | Receiver not reporting to the board | Check sensor wiring and control board terminal block |
Smart Home Integration and Seasonal Maintenance Checks
Smart openers add convenience and a new set of failure points that most troubleshooting guides ignore. If your gate works from the wall button but not the app, the opener itself is fine, the fault is in the network path between your phone and the controller. Work that path in order instead of re-pairing the device repeatedly.
Diagnose the App-to-Gate Path in Order
Start at the opener: confirm the Wi-Fi module has power and its status LED shows a connection, not a blink pattern that means "searching." A detached gate at the end of a long driveway is a common weak-signal spot; a Wi-Fi extender mounted near the gate usually solves it.
Watch out: do not factory-reset a smart controller to fix a Wi-Fi dropout. A reset wipes remote pairings, limit settings, and schedules, and you will spend an afternoon rebuilding what a firmware check would have fixed.
Seasonal Maintenance That Prevents Most Calls
Run this checklist twice a year, once before the cold season and once after the first heavy storm, and most emergency calls never happen:
- Lubricate hinges, rollers, and the drive chain with a manufacturer-approved lubricant; over-greasing attracts grit
- Clear the track and sweep the gate travel path of debris, gravel, and winter sand
- Test the photo-eye sensors and safety loop by breaking the beam mid-travel
- Check the battery backup and replace as needed; a backup battery that will not hold a charge is a spring failure waiting to happen
- Tighten bolts on the actuator arm and pivot point; vibration loosens them seasonally
- Confirm the manual release still works, the one time you need it is the worst time to find it seized
- Inspect the control box for water intrusion and corrosion after storms
- Verify the grounding rod and ground wire are intact before storm season
Post-Storm and Cold-Weather Checks
After a storm, open the control box and look for standing water or corrosion on terminals, dry the photo-eye lenses, and confirm the surge protector has not tripped.
When a fault keeps returning, or the repair involves the control board, high-voltage wiring, or a gate that will not stay aligned, call a professional. Bradshaw Gates offers comprehensive gate opener diagnostics and repair services. If a fault keeps returning, contact Bradshaw Gates for a quote.
Frequently Asked Questions
Why does my electric gate stop or reverse before it closes?
A gate that reverses mid-travel is almost always reading an obstruction. Check the photo-eye sensors first: dirt, spider webs, or a bumped bracket can break the beam and trigger a reversal. Look for a misaligned safety loop or a bent limit switch arm too. If the gate reverses at the same spot every time, the control board is likely getting a false signal from a sensor rather than a mechanical bind. Clean and realign the eyes, then run one full cycle in manual release to confirm the gate travels freely before you reset the operator.
How do I know when gate opener troubleshooting is beyond DIY?
Stop and call a technician if you see scorch marks on the control board, smell burning at the transformer, or find standing water inside the housing. Any fault that traces to 120V wiring, a tripped main breaker that will not reset, or a gearbox that grinds after lubrication needs a licensed pro. Also call for help if the gate has shifted on its hinges or the track has heaved, because those are structural problems an operator reset cannot fix. Repeated repairs on an aging unit often cost more than a diagnostic and a planned replacement.
What causes an electric gate to fail after rain?
Moisture is the usual culprit. Water gets into the control box, the photo-eye lenses fog, or a wet safety loop shorts out and reports a permanent obstruction. Grounding faults make it worse: a poor ground lets a surge travel through the control board instead of dissipating. After a storm, open the housing only if the power is off, check for water intrusion, dry the board with compressed air, and inspect the surge protector. If the gate works once it dries out, seal the housing and recheck the ground rod before the next storm.
How do I reset an automatic gate opener safely?
Cut power at the breaker or the dedicated disconnect, wait 30 seconds, then restore it. Most operators run a self-test and re-learn their limit positions on that first cycle. If your model has a reset button on the control board, hold it per the manual, usually 5 to 10 seconds, until the diagnostic LED blinks. Put the operator in manual release before you test travel so the gate moves freely by hand. If the gate still will not complete a cycle after two reset attempts, the fault is in a sensor, the wiring harness, or the board itself.
A gate that fails in the rain, reverses without cause, or ignores the remote is telling you something. Let the team at Bradshaw Gates read the signal. With comprehensive diagnostics, custom fabrication for difficult terrain, and low-maintenance solutions built to last, we keep your gate running reliably. Get a quote from Bradshaw Gates and stop troubleshooting the same fault twice.
Get a Quote Add bradshawgates.com as a preferred source on Google →Frequently Asked Questions
Why does my electric gate stop or reverse before it closes?
A gate that reverses mid-travel is almost always reading an obstruction. Check the photo-eye sensors first: dirt, spider webs, or a bumped bracket can break the beam and trigger a reversal. Look for a misaligned safety loop or a bent limit switch arm too. If the gate reverses at the same spot every time, the control board is likely getting a false signal from a sensor rather than a mechanical bind. Clean and realign the eyes, then run one full cycle in manual release to confirm the gate travels freely before you reset the operator.
How do I know when gate opener troubleshooting is beyond DIY?
Stop and call a technician if you see scorch marks on the control board, smell burning at the transformer, or find standing water inside the housing. Any fault that traces to 120V wiring, a tripped main breaker that will not reset, or a gearbox that grinds after lubrication needs a licensed pro. Also call for help if the gate has shifted on its hinges or the track has heaved, because those are structural problems an operator reset cannot fix. Repeated repairs on an aging unit often cost more than a diagnostic and a planned replacement.
What causes an electric gate to fail after rain?
Moisture is the usual culprit. Water gets into the control box, the photo-eye lenses fog, or a wet safety loop shorts out and reports a permanent obstruction. Grounding faults make it worse: a poor ground lets a surge travel through the control board instead of dissipating. After a storm, open the housing only if the power is off, check for water intrusion, dry the board with compressed air, and inspect the surge protector. If the gate works once it dries out, seal the housing and recheck the ground rod before the next storm.
How do I reset an automatic gate opener safely?
Cut power at the breaker or the dedicated disconnect, wait 30 seconds, then restore it. Most operators run a self-test and re-learn their limit positions on that first cycle. If your model has a reset button on the control board, hold it per the manual, usually 5 to 10 seconds, until the diagnostic LED blinks. Put the operator in manual release before you test travel so the gate moves freely by hand. If the gate still will not complete a cycle after two reset attempts, the fault is in a sensor, the wiring harness, or the board itself.
Planning a fence or gate project?
Bradshaw Gates serves Northeast Oklahoma and the Four-State area.
Request a Quote Call 918-325-0057